
Getting Started with GitHub Copilot and Copilot CLI.
Copilot began by suggesting code as developers typed. Learn how it grew into a coding assistant, then build a small todo app with Copilot CLI.
GitHub Copilot began as a way to suggest code while a developer typed. It has since grown into an assistant that can explain code and work through coding tasks. This introduction follows that development, then uses Copilot CLI and a tiny todo app to make the ideas practical.
Where did GitHub Copilot come from?
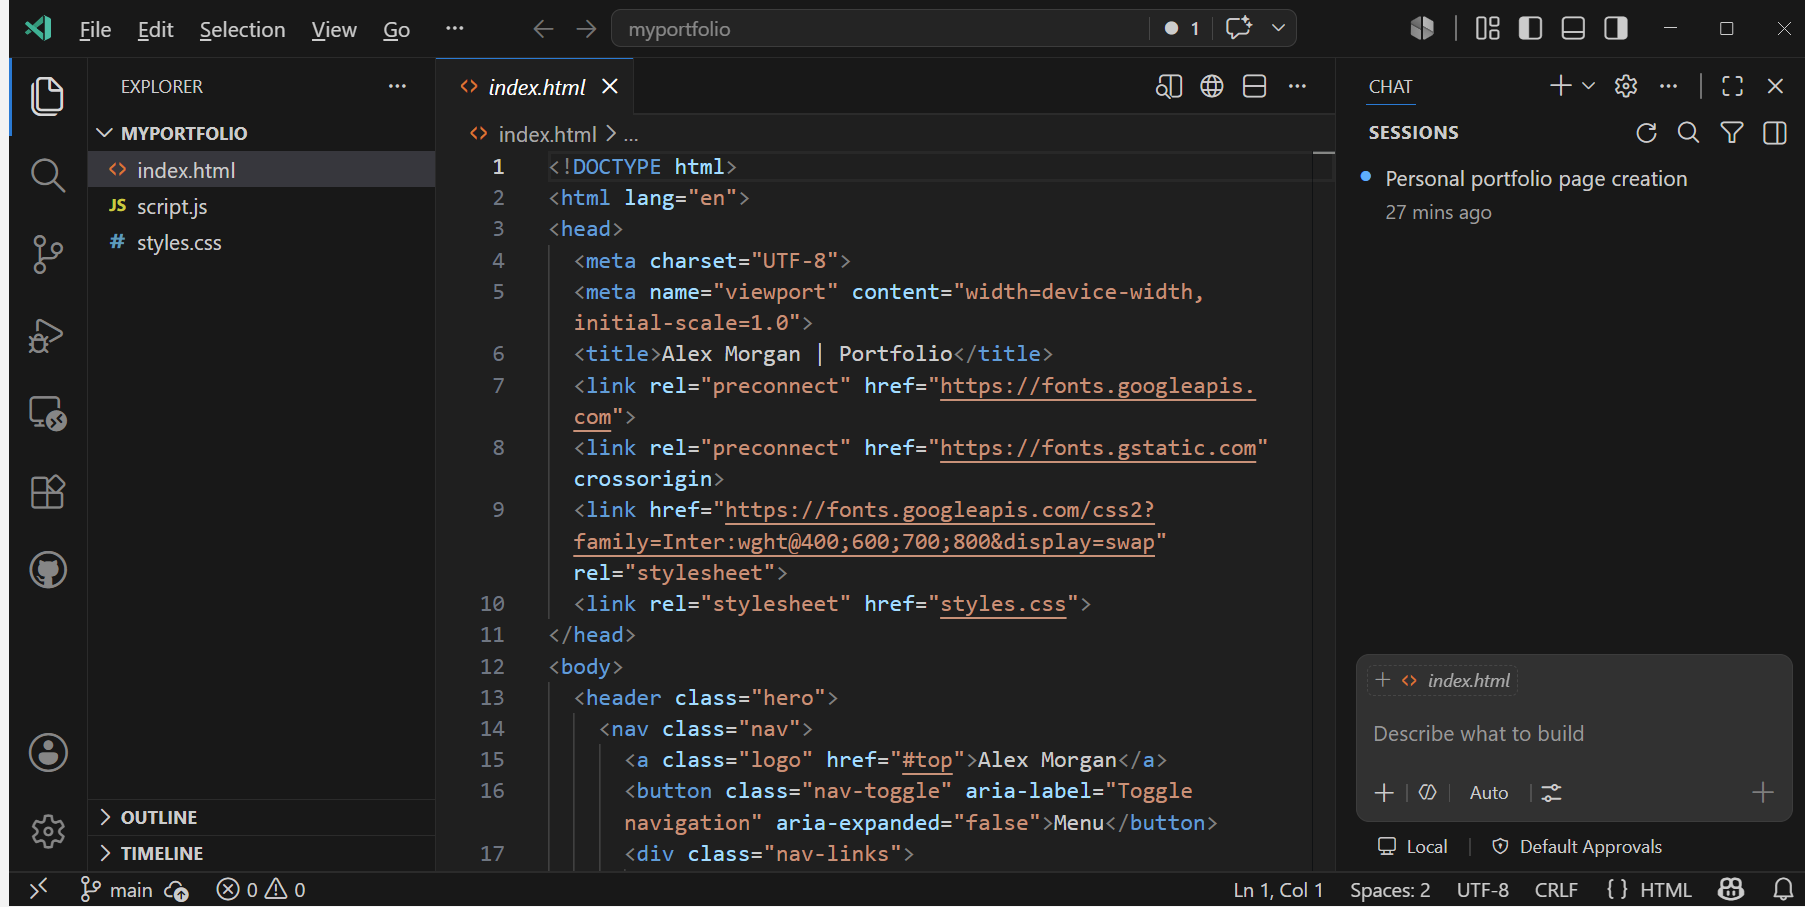
Copilot alongside project files and code in VS Code. Microsoft documentation example (source; CC BY 3.0 US).
GitHub introduced Copilot as a technical preview on June 29, 2021. It was developed with OpenAI and powered by OpenAI Codex. The first announcement described an “AI pair programmer” that used the surrounding code as context to suggest whole lines or functions. [1]
The problem was familiar: even a small feature can involve repetitive code, unfamiliar APIs and time spent searching for examples. Copilot brought suggestions into the editor, close to the code already being written. It did not decide what the application should do; the developer still chose which suggestions to accept.
Copilot became generally available to individual developers on June 21, 2022. Its suggestions could include methods, boilerplate and unit tests, rather than only a single word or line. The practical aim was to spend less effort on routine implementation and more on the problem being solved. [2]
How did completions become chat and coding agents?
Completions help when you know what you want to write next. They are less suited to questions such as “What does this file do?” or “Why is this test failing?” A conversation gives the developer room to ask, clarify and follow up.
In March 2023, GitHub announced its Copilot X vision, including chat in the editor. GitHub described chat that would explain code, help generate tests and propose bug fixes. This was an expansion of the interaction, not just a longer autocomplete suggestion. [3]
The next step was to let an agent work through several actions. GitHub announced agent mode in preview for VS Code in February 2025, including the ability to iterate on changes, respond to errors and suggest terminal commands. In May 2025, it introduced a coding agent in public preview that could take an assigned issue, work in a cloud development environment and return a pull request for review. [4] [5]
The distinction is useful: a completion suggests code; chat helps you discuss it; an agent can use tools to work towards a goal. These are complementary ways of working, not a reason to stop reviewing the result.
What can Copilot help with today?
Copilot can help you understand a codebase, write or refactor code, investigate bugs, prepare tests and review changes. The available features depend on the client, plan and organization policies. [6]
You can meet that assistance in several places:
- In your editor: keep suggestions and explanations beside the code you are working on.
- In Copilot CLI: ask questions and request changes from the terminal, using an interactive conversation. [7]
- In the GitHub Copilot app: connect a local folder or repository, work in an agent session and inspect changes in a visual interface. [8]
- On GitHub: use repository and pull-request workflows to delegate and review work. [6]
Copilot CLI can discuss a change, but it can also work on project files and run tools. Read the proposed actions as well as the conversation. We will use this interactive CLI workflow for the small exercise below. [7]
How do you get started with Copilot CLI?
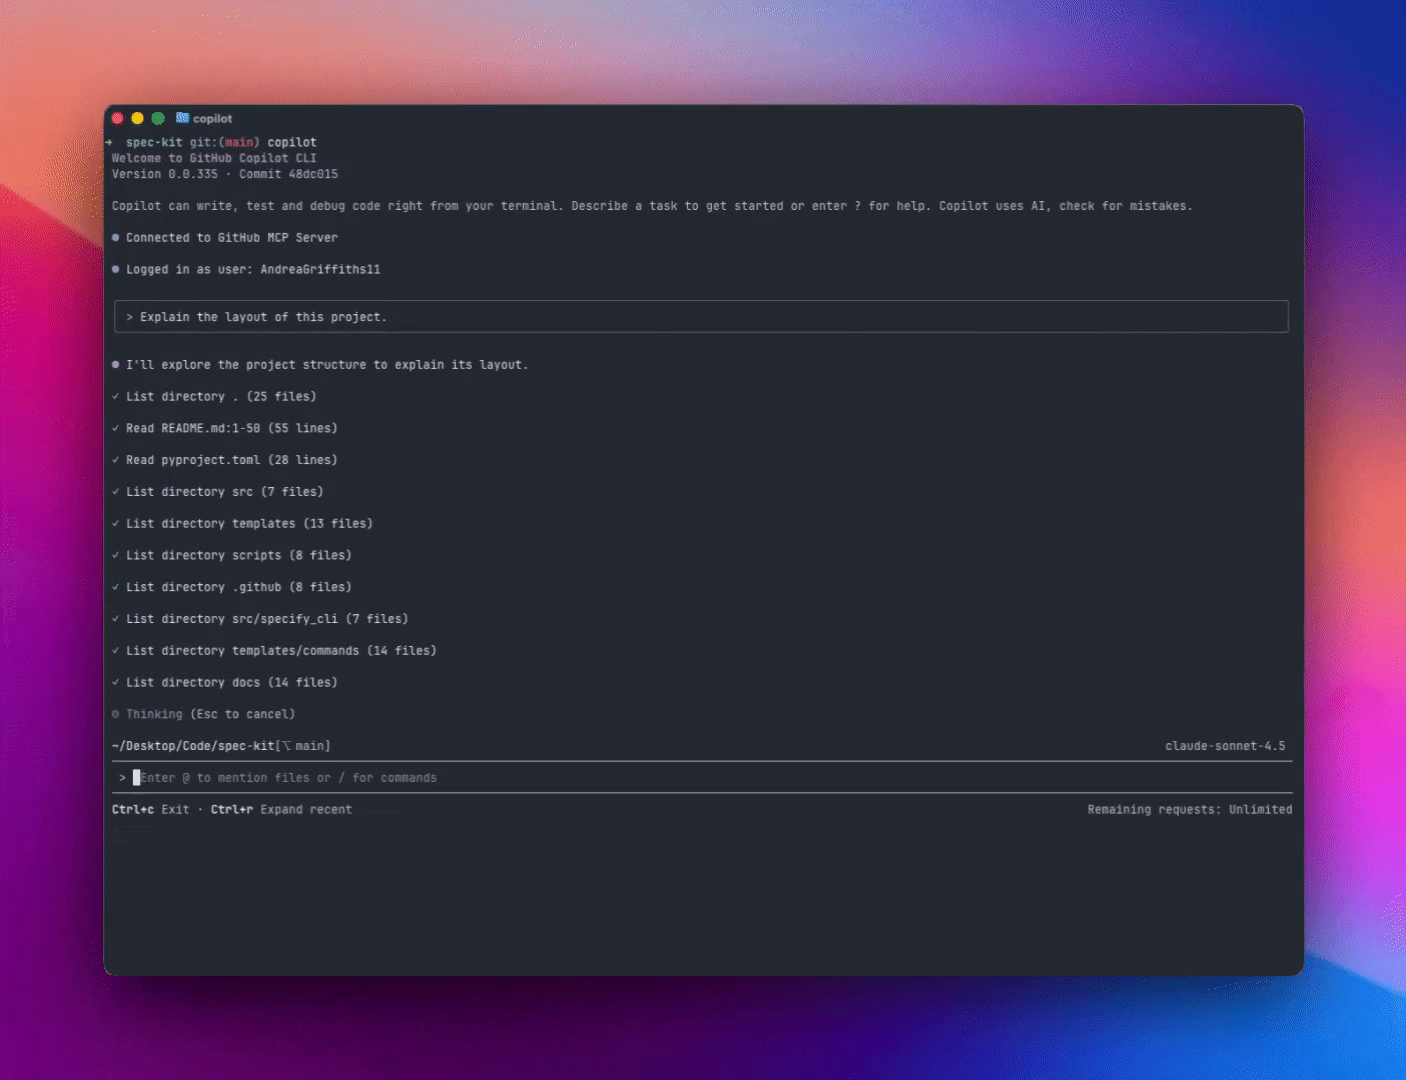
Copilot CLI inspecting a project in a macOS terminal. Still from GitHub’s demonstration by Andrea Griffiths, October 2025.
You need GitHub Copilot access that permits CLI use. If access comes through an organization, its administrator can disable the CLI. On Windows, GitHub lists PowerShell 6 or later as a prerequisite. Node.js 22 or later is required only for the npm installation method below—not for every installation method or for opening our browser app. [9]
Install the CLI
Choose one installation method for your platform; you do not need to run all three.
Windows — WinGet
Run in PowerShell:
winget install GitHub.Copilot
macOS and Linux — Homebrew
If you use Homebrew, run:
brew install --cask copilot-cli
Windows, macOS and Linux — npm
If you already use Node.js 22 or later, run:
npm install -g @github/copilot
GitHub also provides an install script for macOS and Linux, and standalone executables. See the official installation guide for those alternatives. [9]
Open a small working folder
Create an empty folder for the exercise, then start an interactive session inside it:
mkdir my-copilot-todo
cd my-copilot-todo
copilot
Confirm the folder-trust prompt only for a location you trust. If prompted to sign in, enter /login inside Copilot and follow its instructions. You can then ask a question or request a change in ordinary language. Read permission requests before approving commands. [10]
Choose an AI model
The AI model is what Copilot uses to interpret your request and generate its response. Inside an interactive Copilot CLI session, enter:
/model
Choose a model from the available list. You can use /model again to switch during the same session. Available choices depend on your access and organization settings. Models differ in speed, capability and usage cost; for this small exercise, start with the current selection rather than searching for a universally best model. [12] For a broader introduction to AI models and how they power agents, see Agentic AI: A Deep Dive.
Start with a clear request
Describe the result you want and the limits that matter. “Build an app” leaves many decisions open. “Build a three-file todo app that opens directly in a browser” gives Copilot a much smaller target.
Build a tiny todo app
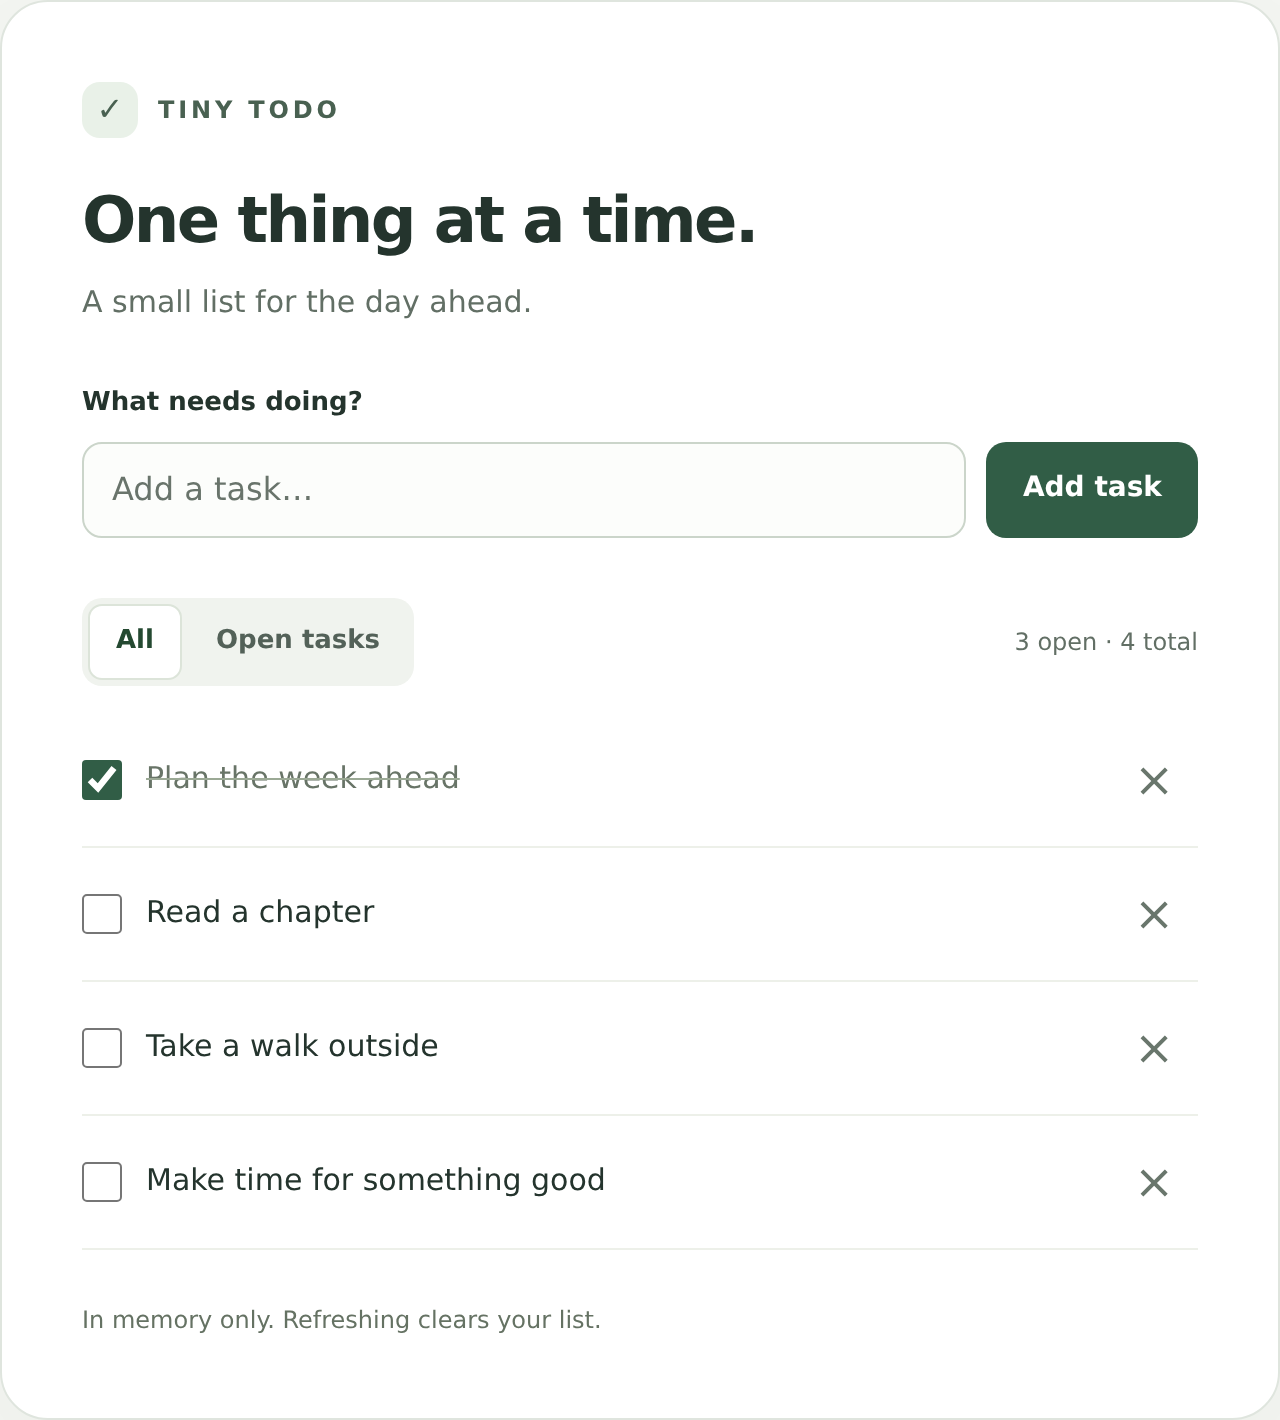
The todo app with task entry, completion and delete controls, and an Open tasks filter.
The complete example code and prompts are available in ferhaty/copilot-todo-demo. Download the repository and open index.html to try the finished app, including the filter, or follow the exercise below to build your own version.
Our application does only three things to begin with: add a task, mark it complete or incomplete, and delete it. A small follow-up adds a filter for unfinished tasks. It uses plain HTML, CSS and JavaScript, with no framework, backend, database or build process. Refreshing the page clears the tasks.
This follows the small, incremental teaching approach of GitHub’s Copilot CLI course. That course builds a Node.js command-line calculator, adds features and tests, and finishes with pull-request review. Here, we use a browser todo app and keep the work local. [11]
Create the first version
Give Copilot this prompt:
Create a tiny browser todo app using index.html, style.css and app.js.
Let me add a task, mark it complete or incomplete, and delete it.
Use plain HTML, CSS and JavaScript. No framework, backend,
database, dependencies or build step. Opening index.html directly
must work: use a classic script, not modules, imports or fetch.
Keep tasks in memory; refreshing clears them. Reject blank or
whitespace-only tasks. Render task text with textContent, not innerHTML.
Use labelled controls and make it usable on desktop and mobile.
Explain the files and how to check the result.
Do not publish, deploy or create a remote repository.
Read the proposed changes and approve only the commands needed for this task. If Copilot starts adding a framework or server, ask it to keep to the three-file version.
Once the files exist, open index.html directly in your browser. The intended result needs no npm install, development server or build command. If yours requires one, ask Copilot to return to the three-file brief. Add two tasks, tick one, untick it and delete the other. Try submitting an empty or whitespace-only task as well.
Add one follow-up feature
After checking the first version, ask for a single change:
Add an Open tasks filter beside All.
All shows every task; Open tasks hides completed tasks.
Switching filters must not delete or reset tasks.
Keep adding, completing and deleting working in either view.
Show a clear message when no open tasks remain.
Keep the same three files and add no dependencies or other features.
Complete one task and select Open tasks: it should disappear from that view, but return when you select All. Add and delete a task with the filter active. This small extension teaches the useful loop: describe one change, inspect it and check the behavior again.
Let Autopilot work through a task
In standard Interactive mode, you guide the conversation with follow-up prompts. Autopilot lets Copilot continue through multiple steps without waiting for a new instruction after each one—for example, making the filter change, checking it and addressing problems it finds. It stops when it considers the task complete, encounters a blocking problem or reaches a configured limit. [13]
Press Shift+Tab until the status line shows Autopilot, then enter a clear task such as the filter request above. Keep the requested outcome and checks specific; Autopilot does not make an unclear requirement clearer.
Autopilot controls continuation, not permissions. If you choose Manual Approval, tool requests that still require approval are automatically denied, which can prevent completion. Enabling all permissions grants much broader access; it is not necessary just to learn the CLI. Start with Interactive mode for the first version of this app. [13]
To interrupt a running turn, press Esc twice. Use Shift+Tab to return to Interactive mode before your next prompt: Autopilot stays selected by default after finishing a task. Inspect the changes with /diff and check the app yourself before accepting the result. [13]
Review the result and keep permissions small
A confident answer is not proof that the application works. Open the files yourself and try the behavior you asked for. Check the page at a narrow width and use the keyboard as well as the mouse. Enter <b>Read this literally</b> as a task: it should remain text, not become HTML.
You can also ask Copilot for a second look:
Review these three files without changing them.
Look for problems with adding, completing, deleting and filtering
tasks, blank input and safe text rendering.
List concrete findings and say what you have not tested.
Treat that response as assistance, not independent approval. If a test was proposed, check whether it was actually run. For this tiny app, a short browser checklist is enough to get started; a testing framework is not a prerequisite.
Keep the exercise in its own folder, avoid sensitive files and retain manual command approval while learning. A trusted folder is not a security sandbox: GitHub notes that permission scoping is heuristic and does not guarantee protection of every file outside it. Do not grant blanket tool permissions simply to avoid prompts. [7]
Conclusion
Copilot’s progression from completions to chat and agents reflects a broader goal: helping with more of the work around writing code. You do not need a large project to understand that progression. A tiny todo app gives you a complete first loop—make a clear request, inspect the files, try the result and ask for one focused improvement.
The todo app is deliberately simple: its purpose is to introduce the workflow, not to show the limits of Copilot CLI. In practice, you can use it to help build websites, APIs, command-line tools and automation scripts, or to extend and improve existing applications. Larger projects involve more decisions and integration work, but the same approach applies: explain the goal, work through focused changes and check the result.
To try this on another project, open its folder, run copilot, and describe a specific change. Use /diff to inspect the result, then run the application and any relevant tests.
Sources
Documentation accessed October 31, 2026.
- Introducing GitHub Copilot: your AI pair programmer - The GitHub Blog
- GitHub Copilot is generally available to all developers - The GitHub Blog
- GitHub Copilot X: The AI-powered developer experience - The GitHub Blog
- GitHub Copilot: The agent awakens - The GitHub Blog
- GitHub Copilot coding agent in public preview - GitHub Changelog
- About GitHub Copilot — GitHub Docs
- GitHub Copilot CLI
- Getting started with the GitHub Copilot app
- Installing GitHub Copilot CLI
- Using GitHub Copilot CLI
- Create applications with the Copilot CLI — GitHub Skills
- Best practices for GitHub Copilot CLI — model selection
- Using Autopilot mode in GitHub Copilot CLI
Frequently asked questions
What is GitHub Copilot?
GitHub Copilot is an AI-powered coding assistant developed with OpenAI. It suggests code, explains code, and assists with coding tasks, evolving from a simple code completion tool to a comprehensive coding agent.
How do I install GitHub Copilot CLI?
Install GitHub Copilot CLI using WinGet on Windows, Homebrew on macOS/Linux, or npm if Node.js 22+ is installed. Each method is platform-specific, and you only need to choose one.
What are the main features of GitHub Copilot?
GitHub Copilot helps understand codebases, write and refactor code, debug, prepare tests, and review changes. It integrates with editors, the Copilot CLI, and the GitHub Copilot app, offering diverse functionalities.
How does Autopilot mode work in GitHub Copilot CLI?
Autopilot mode allows Copilot to execute multiple steps without waiting for new instructions. It halts when the task is complete or encounters an issue. Use specific tasks to guide Autopilot effectively.
What is the purpose of building a todo app with Copilot CLI?
Building a todo app with Copilot CLI demonstrates the workflow of making requests, inspecting files, and testing results. It's a practical exercise to understand Copilot's capabilities without a complex setup.
Can GitHub Copilot work with existing projects?
Yes, open the project folder, run copilot, and describe a specific change. Use /diff to inspect results and test the application. Copilot assists in building and extending applications with focused changes.
About the author
- I’m a hands-on technology architect, engineer and founder of Turing Technology Services, with nearly two decades of experience in software engineering, platform engineering, site reliability engineering and cloud infrastructure. My work combines architecture and implementation with technical leadership, coaching and helping organisations adopt new engineering practices. I’ve worked with organisations including Shell, ING, ABN AMRO, Rabobank, Schiphol Group and Ahold Delhaize, across complex and regulated enterprise environments. On this blog, I share practical guides and perspectives on software architecture, cloud platforms, reliability and AI, explaining the reasoning behind technical choices as well as how to implement them.
Software Engineering
Designing, building and evolving maintainable software. Practical guides to application architecture, APIs, code quality, testing and refactoring, with explicit trade-offs and examples that connect design decisions to implementation.